Search This Blog

Thursday, January 2, 2014

New year, new project!

Welcome 2014!  I have a feeling that this is going to be a great year :).  As always, I need to figure out a few crafting goals for this year.  I'm not completely sure what they will be, but I know that using yarn from my stash will be a top priority.  I also would like to publish a few more patterns and get more stock in my Etsy store.  The rest I'll figure out later.

If you're active on Instagram (like me) and check yarn-related hashtags, you might have seen one for #crochetmoodblanket2014.  This started as a little group and now has developed quite a following.  It is a group of crocheters making squares for either each day or each week in the year that relate to their mood.  By the end of the year you will end up with a blanket!  I thought this would be a fun challenge to try this year, however I didn't want to assign moods to yarn colors.  Rather, I decided to pick a color of yarn that tickled my fancy each day.  I'm only using yarn from my stash and have picked a group of 13 colors.  I have 6 or 7 other sparkly colors that I'm debating throwing into the mix, but we will see how I feel as the year progresses.

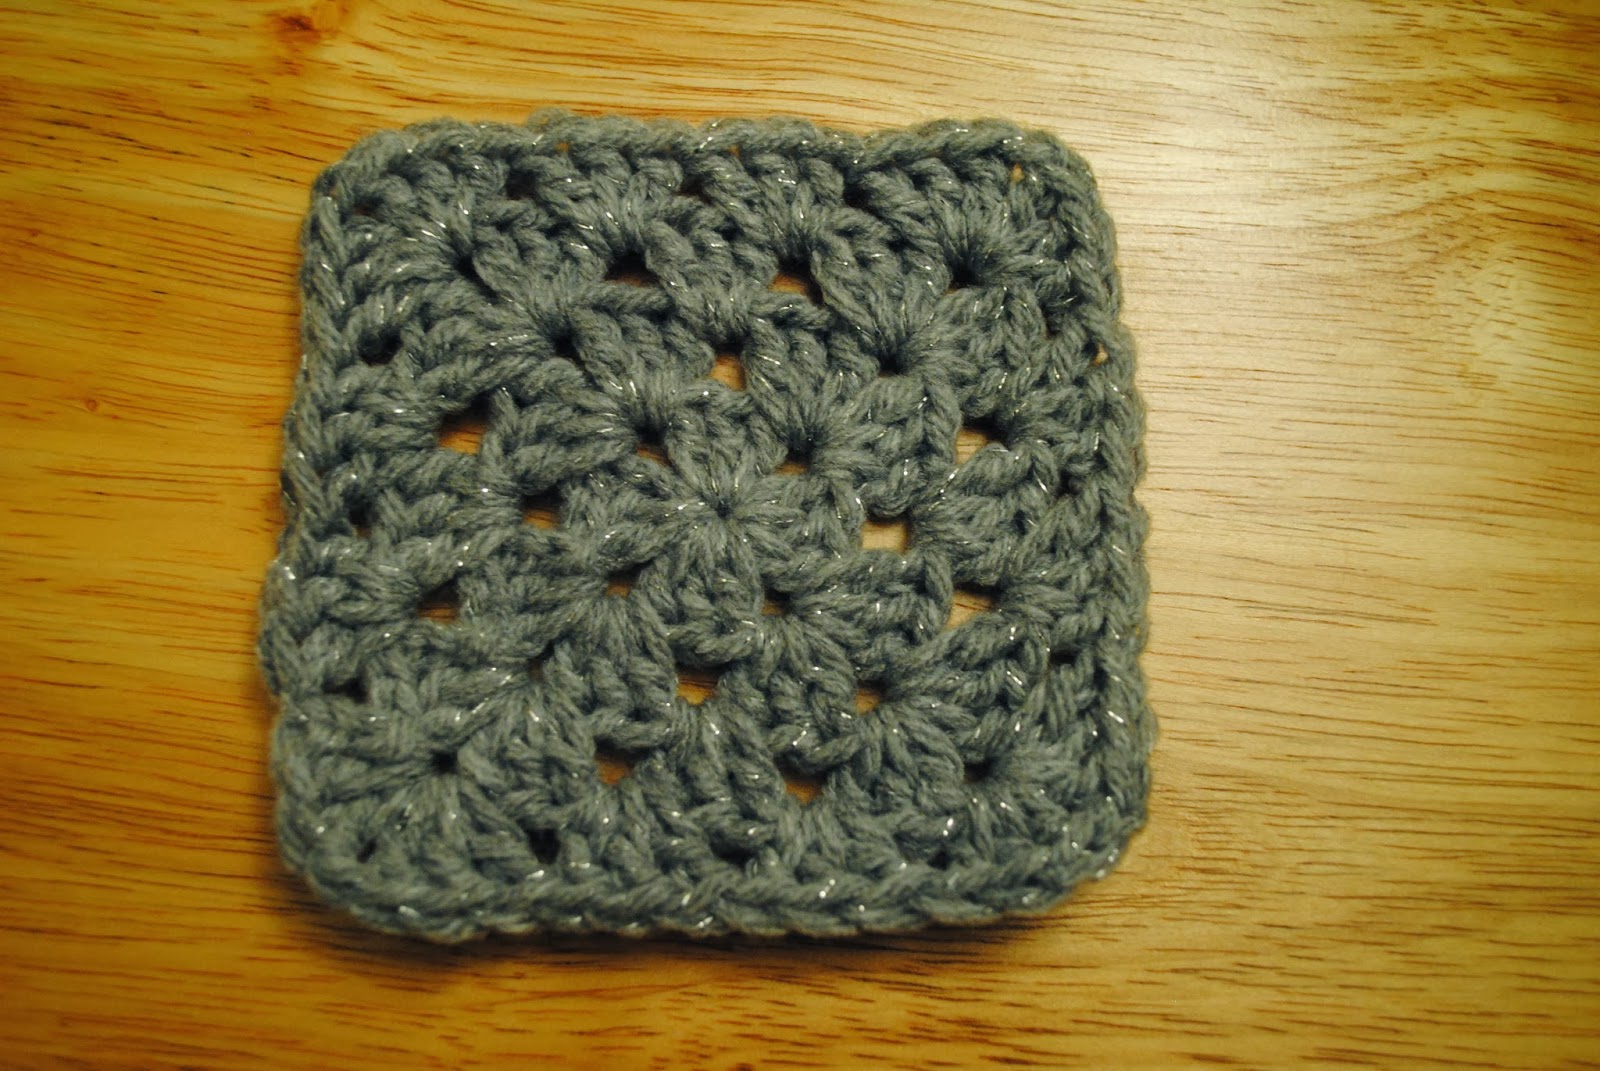
I'm doing very simple granny squares.  4 rounds each using an I hook.  This gets me a 4"x 4" square.  I'm also planning on doing the daily square option.  Actually I'll be making 360 squares for an 18 x 20 square blanket.

I think this will be a lot of fun and I'm going to make it a goal to blog about it monthly.

So, here are my color choices and my first square--a sparkly silver one to represent New Years Day!

All the colors that I've decided to use (most are Red Heart Soft yarn).


Some Caron Simply Soft Party in sparkly colors.  These may or may not make it into my blanket.


The lovely first square.  It's a bit dense, but the holes are small (which I'm liking a lot).

Wednesday, January 1, 2014

Happy New Year!

Wishing you all the best in 2014. Happy crafting!! Happy New Year!


Friday, November 15, 2013

Newborn photo props

One of my close friends is a photographer. You can check out some of his work here.  Well, recently he asked me to make him some props for photos of newborns.  He showed me some pictures and described what he was looking for and I went right to work!  He requested 4 different outfits--a fisherman with fish, a cap and matching pants, a pumpkin cocoon and hat, and a cute hat for a girl with a flower.  So far I've finished 3 of the 4 requests.  (Moving sure does take away crafting time!)

I'm so excited by these little outfits! I tried to make things adjustable--because I know even newborns come in different shapes and sizes.  I can't wait to see the photos he will take with these outfits!

Here we have a matching set--a news boy cap and pants.  I used a gray tweedy yarn and big dark wood buttons!


Next I made two different size white hats.  I used multiple strands of yarn, including one with a little shimmer.  I wanted to get a cute look, but not something very bulky.  The flowers are attached using a button, so they can be switched between sizes :).


And finally this is the fisherman set.  I LOVE the way this came out.  I made a diaper cover that can be adjusted because the buttons fit anywhere on the tabs.  Also, the suspender portion is attached before the bottom is closed to (hopefully) make it easier to get a little one into the outfit.  The fish are attached on a yarn-chain.  AND I adore the little feathers in the hat!  I seriously cannot wait to see this on a little baby!


Monday, November 11, 2013

Moving on up...to the craft room!

So...when did it become November?  This year feels as if it has been flying by!  The scariest part is that I haven't even started my holiday knitting yet!!  Hopefully I will get to it, if not, then I'll have to just be ok with store bought gifts!


In other news, I'm super excited to say that I now have a craft room!  No longer is my yarn in my bedroom/closet, sewing machine in the dining room, and other craft stuff all over!  It now has a room of its very own!  Just over 3 weeks ago I "upgraded" my space and went through the glorious process of moving.  After a few trips to Ikea and unpacking multiple boxes, we are finally settling in, which is such a wonderful feeling.  The craft room is almost done--it still needs some straightening up and some artwork, but most things are put away :).

I went through so many ideas of what I wanted the room to look like.  Pinterest is a glorious thing :).  I ended up getting two more 9-cube cubicals from Closet Maid, a 5x5 expedit bookcase from Ikea, and two tables (one tall one and one with sides that you can put up and down).  I had planned everything out on graph paper--even cut out little versions of the furniture!  However, when we got home from Ikea and built the Expedit and tables, it did not seem as if the arrangement was going to work!  Thankfully after much rearranging we found something that made me happy and optimized the space in the room!

Here's my "wall of yarn"--I highly recommend these Closet Maid "cubicals" for yarn storage.  They are reasonably priced, sturdy, and simple to put together!  I love the bins that you can get for them too.  Almost all of my yarn is stored here...almost.


On the other side of the room is the Expedit bookcase.  I love this thing, but it definitely takes some muscle to get it together!  I originally wanted to fill this with yarn, but my books started taking over.  In fact, I had to move all of my school books, well most of them, to bookcases in the living room and dining room!  I still want to get some drawers for this unit, but I haven't found the ones I want.

I love the talk, skinny table that you see here.  It's a good height to cut fabric and work on while standing (the legs are adjustable yay!) and it works perfectly with the stools that I already had!  I guess that's the "computer station."


This portion is still a work in progress and definitely messy.  That table is where the sewing machine is going to live.  I have a nice bright light that will be perfect as I'm working on projects!  I also got a 2x2 expedit bookcase that's holding my ginormous printer!


So far I'm LOVING this room!  I can't wait until it is finished!  Unfortunately, it wasn't one of the "priority" areas to unpack, which is why it still isn't done 3 weeks later.  Soon it will be! (and then I'll post some "ta da!" photos!)

Until then! Happy crafting!

Friday, September 13, 2013

New REVIEWS page!

I've just added a new page for reviews from my customers.  I'd also love to add reviews from people who have used my free patterns!

If you'd like to leave a review (and I would love it if you did) please leave a comment on my "Craftini Marini Customer Reviews" page!

In case you're confused by "Craftini Marini" let me explain.  That's the name of my craft business!  You can find me on Facebook and on Etsy!  People have always liked to rhyme my name with things...and one day someone said to me "Jessica, you're such a Craftini!" and that's how Craftini Marini was born.

I promise to have lots of updates of my latest yarny endeavors! <3 br="">

Friday, August 2, 2013

Columbia cup cozies

So, as you all know, I successfully defended my dissertation and received my PhD this past semester.  It is sort of customary to give a gift to your advisor and dissertation committee as a thank you for taking the time to read your dissertation, provide a thorough examination of your ideas and work, and give you constructive feedback on your research.  I decided to give each member of my committee, my advisor included, a coffee cup cozy and a gift certificate.  I use a wonderfully simple pattern for the cozies.  Columbia colors are light blue and white, so I made the base of the cozy light blue and added a duplicate stitch "C" in white.  I was really pleased with how they came out and my committee loved them.


Tuesday, July 30, 2013

Tunisian crochet potholders

In February I stumbled upon a fantastic pattern for potholders.  The pattern is free on Ravelry and can be found here.  I've been playing a bit with Tunisian crochet, but never really made anything with it.  Just sort of played around trying to learn the stitches.  These potholders were a great way to practice Tunisian simple stitch (TSS).  The only downside is that the pattern doesn't tell you how to do TSS, so I had to do some googling to get the instructions down pat.

However, the finished product is amazing!  It is thick and double sided.  You construct a rectangle and then fold it over and add the border through both pieces--so cool!  It really is good for handing hot lids and handles while cooking.  If you're looking to try Tunisian crochet I suggest starting here (and with some YouTube)..the result is great!

I made an orange one for myself (not pictured) and these two for my mom.  They were her Valentine's Day gift, so I cross stitched a little heart on each of them.  (That might be one of my favorite things about TSS--it's perfect for cross stitching on!)


Saturday, July 27, 2013

Yoga mat bags

If you don't know this about me already, you need to know that I love yoga.  Everything about yoga--the message, the spirit, the teachings, the poses, and the way that it is part of everything in life.  My love of yoga ties with my love for yarn (now that's saying something, isn't it?).  As you know Matt just completed his yoga teacher training and he has been teaching me a lot about yoga and its foundations.  He specifically has been teaching me about Raja yoga and its 8 limbs.  I have been trying to abide by the yamas (the first limb that represents the social code) and the niyamas (the second limb that have to do with the 'self').  One of the yamas is Aparigraha which says that one should not hoard things and should be non possessive.  I do have a problem with this sometimes (evidenced by my growing yarn stash).  So I have been trying to work on this in various ways.  I've been gathering items to donate, trying to get rid of items that are unnecessary to me, and also trying to destash when possible.  I am definitely not an expert on the yamas or how to live by them, but I am trying my best.

So what does this all have to do with knitting and crocheting?  Well, I have been making yoga mat bags with my stash.  I am planning on "selling" them at my yoga studio very soon.  The yoga studio has a boutique and it would be a perfect place to sell these items.  So far I have made 4 different bags and have at least one more planned before I'm going to bring them to the studio.  I've used a bag for my yoga mat that I knit back in 2011 and I'm ALWAYS getting complemented about it.  I really like it--it is machine washable and dry-able and is perfect for quickly stashing a sweaty yoga mat.  However, there were things that I could improve on--the strap was too long and the drawstring tie would come untied or be a bit of a pain to tie.  So I improved on these things with the new bags I made.

Here are the first two I've made for the studio.  The purple one is crocheted out of cotton in a ripple pattern.  You can see how they feature a shorter strap and a drawstring that cinches closed when you pick up the bag.  That's my favorite part :).  The second one is knit out of acrylic and also features the same shorter strap and cinching drawstring!

I have two others--one that looks like a tree and a blue lacy one that I developed the pattern for.  I'll post those in another entry when I get some decent photos of them.  I'll also be posting the pattern for my lacy mat bag--so keep an eye on my blog for that :).


Thursday, July 25, 2013

So this happened yesterday...

...my latest Knit Picks order arrived!!  I definitely use yarn as a way to relieve myself of stress. (Hey it's better than many addictions!)  Last week I had a couple of stressful days at work and definitely took refuge in the Knit Picks summer sale and a gift card I had :)

Here are the knitty-gritty details and planned projects!

-14 skeins of Wool of the Andes Sport in Mai Tai Heather for my Humboldt Raglan
-14 skeins of Wool of the Andes Sport in Marina for a Larch Cardigan
-Curio in Ash and Bluebell for who knows what (it’s super soft btw)
-6 skeins of Comfy Fingering in Lilac Mist for an Elvira All Grown Up
-9 skeins of Wool of the Andes Worsted in Claret Heather for a Washington Square Vest
-two balls of Galileo in Nebula for something (can’t remember what I planned to use it for…perhaps a cowl)
-and finally 3 skeins of Felici in the colorways High Tide, Aquarium, and Fizz (I’m thinking of using all of my Felici to make some sort of blanket…perhaps a Babette-esque blanket).

Welcome new stash! You're already very loved!!!

Wednesday, July 24, 2013

Baby Mermaid

Let's rewind to the beginning of the year.  One of my close friends was pregnant with her second child (I believe she was due in March).  She already had a boy back in 2009 and this time she was having a little girl!  I know she was super excited for dresses and other girly things!  I had crafted a few things for her son--a little puppy, a blanket, and some bibs--you can see the post here.  So, I obviously wanted to make various things for her daughter too!

I've been trying to be on a destash mission--which has worked some what, but I must admit that I've also purchased yarn...tisk tisk tisk, Jessica.  However, back at the beginning of the year I was TOTALLY on the "cold sheep" "use only from stash" bandwagon!  I've also been trying to use patterns that I already own, rather than finding something new or buying a new one.

So with that in mind, I found the cutest pattern from a Crochet Today! magazine to make for my friend's daughter!  The pattern is called "Mermaid Cocoon" and is from the July/August 2012 issue of Crochet Today!  I totally fell in love with this pattern when I first saw it.

I was pretty lucky that I had both mint green and teal yarn in my stash!  I just reversed the colors of the tail--making the teal the main color and the mint the accent.  I also had white and purple!  They are all simply soft yarns, so you can just imagine how soft and snugly this outfit is before washing and how much softer it will get!

I added little white buttons to it rather than colored ones.  I spent an awfully long time standing in the button aisle of Jo-ann's picking out the 'perfect' buttons :).

The construction of the garment is so interesting!  It is all made in one piece without seaming.  You start with the bodice, then work the arms, and then the tail portion.  It was so quick and only took me four days to make!  I'm so pleased with it and can't wait to see pictures of little Keira in it!