**To make a wider caddy, just add chains. This stitch pattern is worked in multiples of 1.**

Couch Caddy
Dimensions: 10-12 inches wide by a few feet. Height depends on size of couch arm.
Gauge not important for this project as it is quite customizable.
Materials
-About 550 yards of Aran or Worsted weight yarn. You’ll be using two strands held together.
-M/N (9.0 mm) or size to give a fabric you like.
-Stitch markers or something to secure the pocket portion in place while you edge the caddy.
-Needle to sew in ends.
**American crochet terms are used in this pattern**
Skills needed:
-Chain
-Double crochet
-Reverse single crochet (aka crab stitch)
Abbreviations:
-CH - chain
-DC – double crochet
-TC – turning chain
-RSC – reverse single crochet
Instructions:
How to determine your caddy’s length:
This pattern allows for about a 1 foot deep pocket. Measure over the arm of your couch or chair where you wish to use the caddy. Determine the length that you’d like to dangle off the arm and measure down under the couch cushion. The end of the caddy will be tucked under the cushion so that it does not slip off. Add 1 ft to this measurement for the pocket.
Holding two strands of yarn together throughout the pattern…
Row 1: CH 22 (or desired width of caddy).
Row 2: DC in 3rd chain from hook. DC across. CH2, turn (20 DC).
Row 3: DC in space between the two DCs in the row below. You’ll be just about next to the TC. (See picture).
As you start the row, it will look like this:
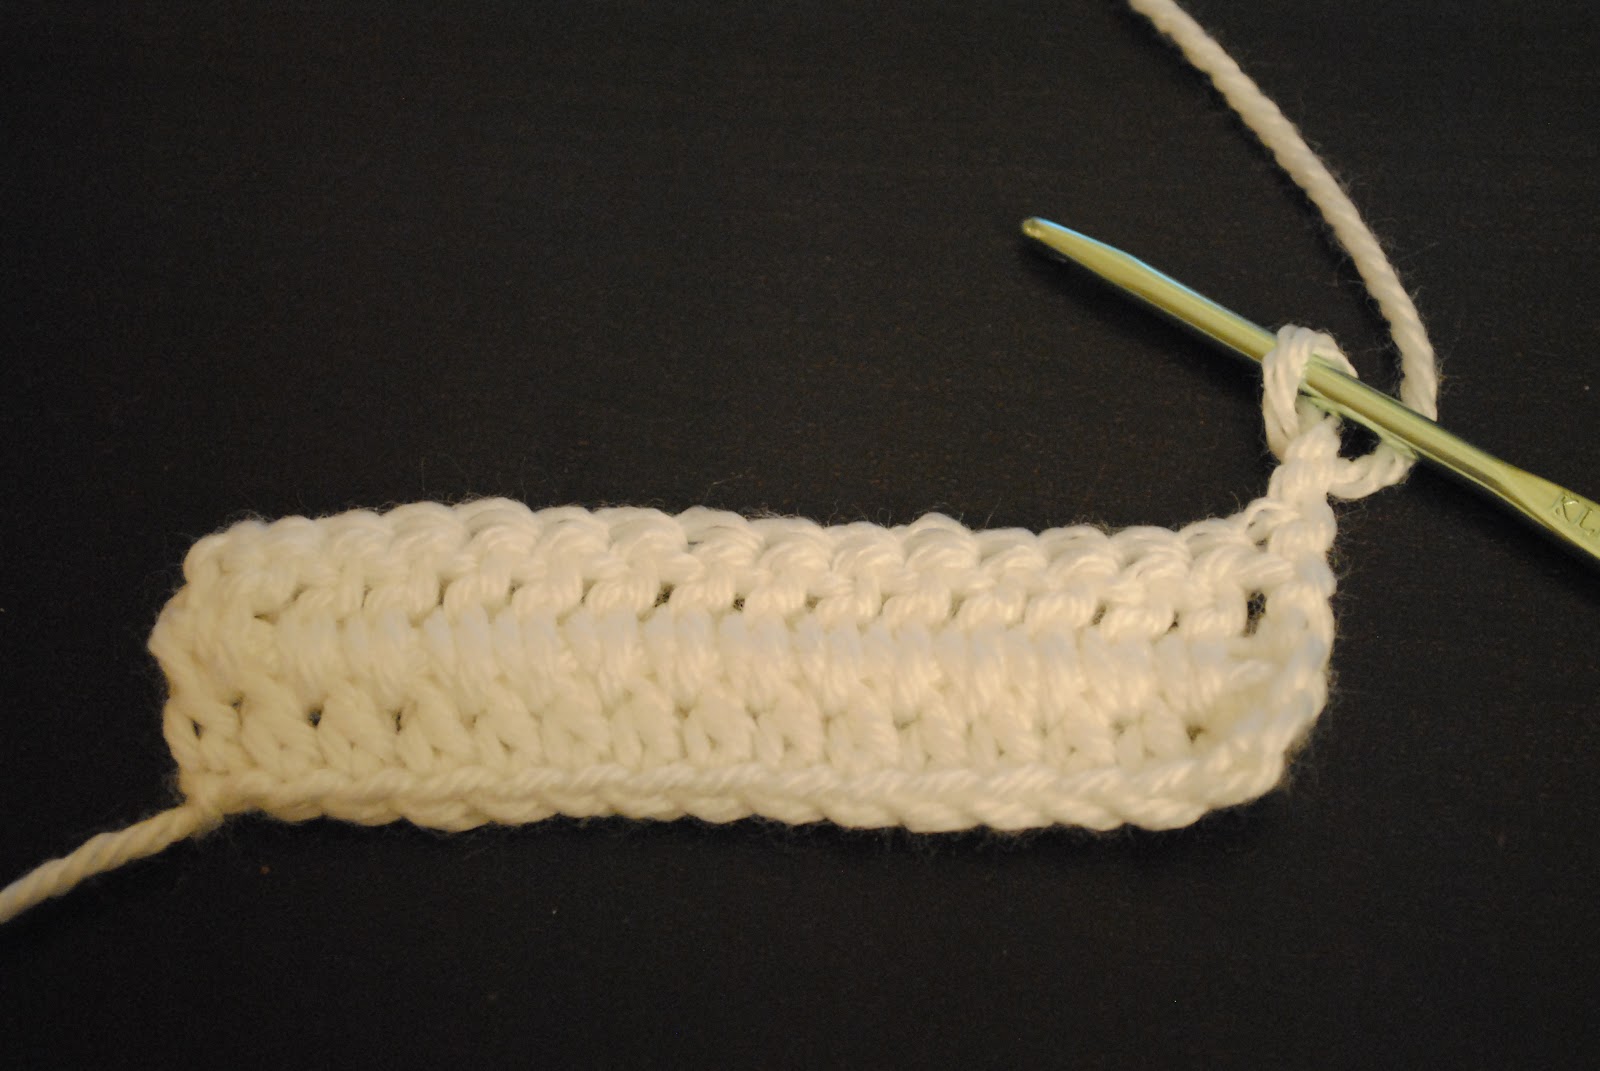
You want to go between these first two stitches.

DC in each space across until you reach the space between the previous row’s DC before the TC. DO NOT DC in this space. DC in the top of the turning chain. CH2, turn. (20 DC and 1 TC).
Here is a diagram of what you're doing. Start at the bottom left hand and work back and forth as you go up. See how the first DC is made between the first two DC and the last is made in the TC, not next to it.

Row 4: Repeat row 3 until the caddy is the desired length, explained above.
Assembly:
-Fold the top of the caddy (where the working yarn is) down about a foot and align the edges.
-Secure on each side using stitch markers or safety pins or binder clips…or the like.
-Begin to RSC all around the caddy. When you get to the double thickness of the pocket and back of the caddy, be sure to crochet through both layers.
-Once you RSC all around, slip stitch to the beginning RSC.
-Cut yarn and tuck in ends.
If you’d like, you can also sew a line between the pocket and the back to create a divider in the caddy.


Simple and such a useful thing to crochet!
ReplyDeleteAww thank you! :)
DeleteI'm new I get the dc, and t.v., but in row 3 I get confused. I literally have only done a couple small projects
DeleteHi Gema,
DeleteSo, in row 3 you will be placing your DC between the two DCs in the row below. So, don't crochet into a stitch, but make it between them. You continue doing this for the entire project.
This is not my video, but it is very helpful for showing you where to place your stitches. The video is called "How to Work Between Stitches" and is by Crochet Cabana.
https://www.youtube.com/watch?v=cdcYqLkeMoI
I hope that helps.
Thank you for sharing your lovely and very practical pattern.
ReplyDeleteWhat do you mean by holding two strands of yarn together throughout the pattern? Because your pictures say different, I'm confused.
ReplyDeleteYou need to hold two strands of yarn together as you make the caddy to obtain the size and gauge in the pattern. Alternatively you can also use one thick strand (super bulky or something that gives you gauge) to make the caddy. The pictures of the stitch used are only to show how to work the stitch.
DeleteOh okay thank you so much!
ReplyDeleteHi! I've posted a link to this pattern here on my blog post http://mylovelyhook.blogspot.it/2016/03/5ideeuncinettoperfestadelpapa.html
ReplyDeletebeen looking for one f these. thnx!
ReplyDeleteI had another pattern for this but it had a pattern that made it stretch. Does your pattern stretch any? What if I lined it before sewing front of pocket to back?
ReplyDeleteThank You and I have a super supply: How Much Are House Renovations Stardew Valley home renovation contract template canada
ReplyDeleteI don't really understand it lmao. It might be me
ReplyDelete