Search This Blog

Wednesday, December 26, 2012

A Recipe for a Towel Topper

Over the past 3 or 4 years I have given my mom towels for the kitchen as a Christmas gift.  Each year she loves them.  Maybe it is the practicality of them or the handmade-ness.  Whatever the reason is, I always know that they will be a hit.

One of the things that I had always wanted to make was a towel that hangs on the fridge.  I've made a knit versions before--these and these, but I had always wanted to use an actual towel because I find them to be more absorbent.  I just needed to attempt to "top a towel." 

I had read some tutorials...they all involved cutting a dish towel in half and then crocheting over the cut side to make the topper...and that is great and all, but I didn't want to have a raw edge.  So I went to the store and bought some "bar mop towels" to use instead.  These are smaller than dish towels (definitely length-wise smaller maybe width-wise too) and have a finished edge on all sides.  

Now I needed to decide what to use to pierce the fabric so I could crochet the topper.  Should I use scissors? Purchase a sharp crochet hook? Use a needle and thread?  I remembered that I had purchased a skip stitch blade for my rotary cutter a month or two ago to use on a blanket edging...and I wondered if I could use that to top the towels too!


So, I got out my self-healing cutting mat, my rotary cutter, and the skip stitch blade and gave it a try.  The blade did go through the layers of the finished edge with adequate pressure--which is totally great! I then tried different sized crochet hooks to figure out which was best for this project--I ended up settling on a G hook with worsted weight yarn.  The G hook allows the tension in that first row to begin to ripple the towel.


I found that the best placement for the holes was sort of in the middle of the finished edge--not too close to the end of the towel.  Going in more, toward the body of the towel isn't terrible....you'll just need to adjust your tension on your first row of single crochets.

Now, so far I've tried 4 different towels and I get different numbers of holes in the pass with the skip stitch blade.  Sometimes it is 25, sometimes 27, sometimes 28, etc.  Because of this, I can't post an exact "pattern" for the topper--at least for the starting row, but I can give you a recipe on what to do.


Materials:
-Bar mop sized towel
-worsted weight yarn
-size G crochet hook
-a smaller crochet hook and maybe a pointy one just in case.
-a yarn needle for sewing in ends
-a button
-needle and thread
-skip stitch blade and rotary cutter
-self-healing cutting mat

Directions:
Place your cutting mat on a sturdy hard surface.  
Load the skip stitch blade into the rotary cutter.
Run the blade along the top finished edge of the towel, approximately in the middle of the finished edge.
Be sure to make a hole close to the beginning and close to the end of the towel (where the finished edge is the thickest).
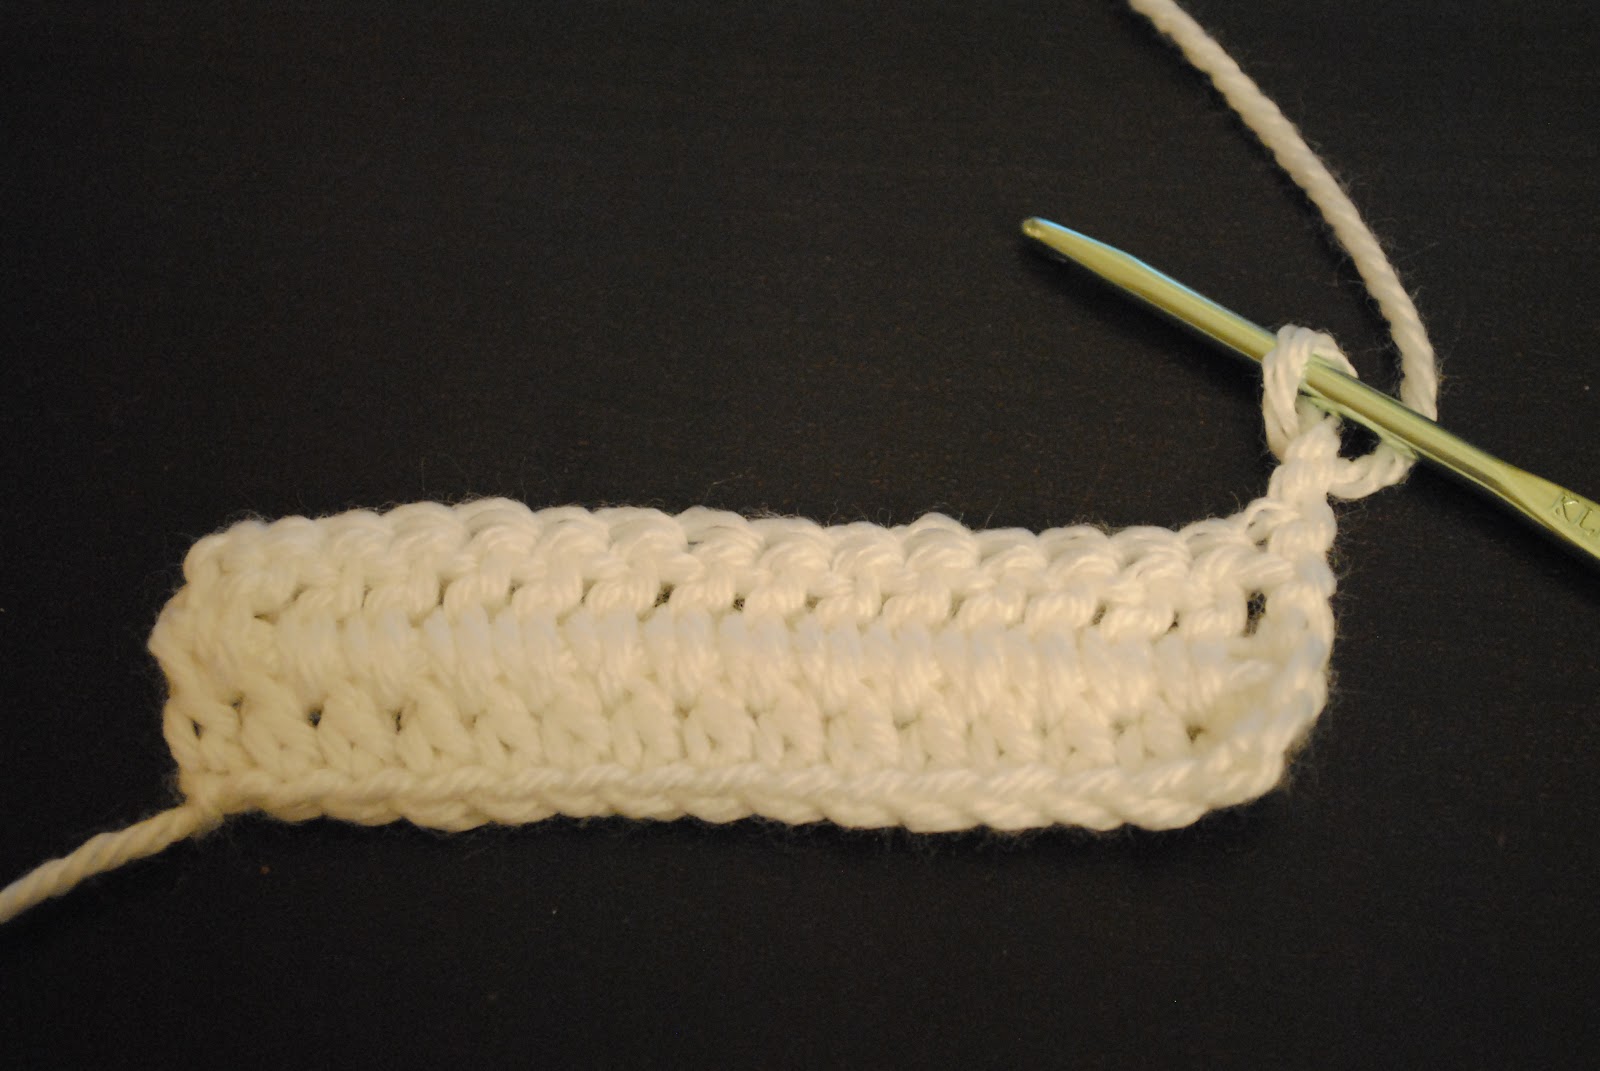
Crochet one row of single crochets across the top of the towel--this is where you work directly into the holes you just created.


Crochet one more row of single crochets and take note of the number of stitches in the row.

Now, here comes the recipe.
Recalling the number of stitches in your row...is it even or odd?

If it is even, figure out where the middle of your row is, you will be working a double crochet two together decrease on these two stitches.

Chain 2 (this does not count as a double crochet).  Double crochet two together, then double crochet until you reach 1 stitch before your middle two stitches (aka work right up to the middle two stitches).  Double crochet these two together, and then double crochet until there are two more stitches left to work.  Double crochet these together.

For example, if you end up with 28 stitches, the middle stitches are the 14th and 15th stitch, so you will be decreasing these two together.  So what you would do would be ch 2, dc2tog, dc 11, dc2tog, dc 11, dc2tog.  This will leave you with 25 stitches.

If you have an odd number of stitches in your row you can ignore finding the middle two stitches and work as follows:
ch 2 (doesn't count as a dc), dc2tog, dc across until there are two stitches left to work, dc2tog.

Example: 29: ch 2, dc2tog, dc 25 times, dc2tog, resulting in 27 stitches.

Did you follow that?  What you want is to end up with an odd stitch count.  If my method confuses you, decrease any way you'd like as long as you have an odd number in the first row of double crochets.

The "pattern" really starts when you have 25 stitches in your previous row.

Just as before, the chain 2 in the beginning of each row does not count as a stitch.

Once you have 25 stitches....
--Ch 2, dc2tog, dc 21 times, dc2tog, turn. (23 stitches)
--Ch 2, dc2tog, dc 19 times, dc2tog, turn (21 stitches).
--Ch 2, *dc2tog, dc* repeat from * to * across, turn (14 stitches).
--Ch 2, dc2tog across, turn (7 stitches).
--Ch 2, dc2tog, 3 dc, dc2tog, turn (5 stitches).

Now you start the band that will wrap around your refrigerator handle.
--Ch 2, 5 dc across, turn.

Repeat this until it is slightly shorter than the desired length.


Begin the button hole part:
--Ch 1, 5 sc across, turn.
--Ch 4, join with slip stitch to the 5th sc in the previous row.

Fasten off and weave in ends!
Sew on a button and enjoy.


I do apologize if any of this "recipe" is confusing--let me know if you have any issues!  I hope you all have fun making your towel toppers!

Monday, December 24, 2012

Merry Christmas!

Today is Christmas Eve and my family and I will be celebrating later.  I have been so busy crafting projects lately!  I will have a post showing them, once I give most of them away :).  Yesterday I gave Matt his Christmas gift...the sweater I had been working on since before LAST CHRISTMAS and a few other things.  It made my heart melt when he totally fell in love with it when he opened it!  :).  I'm so happy he liked it and I'm so thankful for a best friend like him!


Whether or not you are celebrating today or tomorrow I still wish you all the best of the season!

Sunday, December 16, 2012

Thermal Tweed Scarf

Maybe it is just me, but I have trouble finding scarves that look "manly."  When I make something for a guy I'm always worried that he isn't going to like it or maybe he will find it too feminine.  (I'm not one for gender labeling, but you never know how a recipient of a gift will feel.)  Well, I think that I found a nice manly/gender neutral scarf.

I present to you, the knit Thermal Tweed Scarf.


Supplies:
3 skeins of Vanna's choice tweed yarn
Size 9 and 10.5 knitting needles
Gauge: 16 stitches = 4 inches in stockinette stitch (on size 9 needles or whatever size gives you gauge)
yarn needle for weaving in ends.

Instructions:
Cast on 31 stitches using the larger needles then switch to smaller needles to knit the scarf.  (If you'd like a wider or skinnier scarf just make sure that the cast on number of stitches is an odd number.)

Just as a note, the first and last stitch will make the border of the scarf.

Row 1: K1, *K1, P1*, repeat * to * until 1 stitch before end, K1.
Row 2: K1, *P1, K1* , repeat * to * until the end.
Row 3: K all stitches
Row 4: K all stitches.

Repeat this pattern until about a half inch from desired length.  A good idea of the "proper" scarf length is the height of the person wearing it or just a tiny bit shorter.  This will allow it to be wrapped around the neck or halved and then slipped through.

Once you reach this length, repeat Row 1 and Row 2 and then bind off knit wise using the larger needle.

Weave in ends and enjoy!


Here is a close up of the detail of the pattern and how it looks in the tweed yarn.  Nice and textured, but still simple and clean looking!

Friday, December 14, 2012

Teething/nursing necklace

What a busy month December has been! Between school work, crafting gifts, and preparing for the holidays I've simply not been able to find the time to blog! (But that doesn't mean that I haven't been thinking about you guys :)).  I've actually been working on a few new patterns that you'll hear about today and in the next few days/weeks.  There will also be a few "ta-da" moments when I'll present my finished Christmas gifts, but that will definitely come after Christmas so I don't spoil any surprises!

So without further ado, I present you with my new pattern for a teething/nursing necklace!

Here is the back story...about a week and a half ago my friend asked me if I could make a necklace that she could wear when she is feeding her 5 month old son, because he is so alert that he is getting distracted by all the visuals in the room as he is eating.  She showed me a picture of something she found online and asked if I could make something similar.  The necklace she showed me had wooden beads of different sizes, wooden beads covered by crochet, and a crocheted cord.  A necklace like this would also be good when he starts teething.  She told me that she wanted a few beads and gave me the supplies (a ribbon and the wooden beads) to use for the necklace.  The colors she wanted were blues and greens.  Now, since I'm trying to use yarn that is in my stash, I looked to see what I had in those colors.  Turns out I had a nice amount of Vanna's choice.  Then I tried to find a pattern to crochet around a wooden bead, using aran weight yarn...but I couldn't find one.  So....I made my own!


Supplies:
What you'll need are some wooden beads--I used round 1 inch wooden beads--you can find these at a craft store.
Aran (or worsted) weight yarn, like Vanna's choice.
A G crochet hook.
Some ribbon or extra yarn to chain a necklace
And a yarn needle for sewing in ends/threading beads onto the necklace.

Abbreviations:
ch = chain
sc = single crochet
sc2tog = single crochet 2 together
ss = slip stitch

Gauge: Not really important, but try not to crochet TOO tightly as it will be harder to get the bead inside the crocheted outer "cup."

The beads are actually very simple to make.  They are worked in the round, so do not join the rounds with ss.

Round 1: Start by ch 3, and ss to the first stitch to make a tiny loop.
Round 2: Make 6 sc into this loop.(6 sc)
Round 3: Make 2 sc into each stitch in the previous round (12 sc).
Round 4: Make *2 sc in next stitch, 1 sc in next* around (18 sc).
Round 5: sc in each stitch around (18 sc).
Round 6: *sc2tog, sc* around (12 sc).

Up until this point you have not worked with the bead.  You'll place the wooden bead into this little crocheted "cup" during the next round.

What you have should look something like this

Begin Round 7: sc2og around (6 sc)-- when you've completed maybe 2 of the 6 stitches in this round, insert the bead.
Push the bead inside.
I've found it works better to pull up the "cup" over the bead as you work the sc2tog. 

When all the stitches of Round 7 are complete, join to the next stitch (aka the first stitch of round 7) with a ss.

Tuck in ends.  I found it works well to place a crochet hook through the center of the bead/covering so that you can sew in the ends.  This also makes sure that everything lines up appropriately.


For my necklace I made 7 beads in different colors.


Next, string them on to your desired length of ribbon.  Rather not use a ribbon? Chain a desired amount with a yarn of your choice and string the beads on that.  Want to mix in some wooden non-crocheted beads too? Go ahead! :).  To clean it, you can soak it in cool water and let it dry.

Happy crocheting!  Feel free to use this pattern as you please, just do not reproduce the text or pictures without my permission.


Tuesday, November 27, 2012

Tis the season!

Somehow this yearn has FLOWN by!  It seems as if it was just the beginning of September...and now here we are approaching December!  I do have to say that I had a WONDERFUL Thanksgiving :), the best I've had in a long time!  I have such a wonderful family and it meant the world to me that Sean could spend the day with me and my family :).

When I was little we never put the Christmas tree up RIGHT after Thanksgiving...we sort of waited a week or two (?) or maybe even more depending on schedules!  However, since I started grad school I've learned that if I don't get the tree up on Black Friday it might not even get up! Sooo...that's exactly what Sean and I did on Friday :).  We put the tree up! It really was a lovely time....Christmas music playing as we fluffed up the branches of the tree that was in the attic for a year.  I was highly amused every time Sean said "wow you have more ornaments to go up?" :).  What can I say...I like my tree with lots of ornaments on it!  The bow I made back in...um..2008 I think, still looks pretty good atop my tree!

What do you think?


We also have an "Our 1st Christmas" ornament this year :).  Sean bought it for me at a Holiday Boutique we went to two weeks ago....he's so thoughtful.


I have a crocheted nativity under the tree.  I bought this a few years back before I ever tried to make an amigurumi.  I'd love to make myself a nativity one day.  For now, I adore this set!


This year, I also decided to make myself a holiday bunting.  Last year I had participated in an Attic24 themed swap on Ravelry and I had received 4 little granny trees as part of my package.  I had them hanging in my office last year, but I knew that they needed a better way to be displayed! (Especially since I have only been in my school office 1 time a week lately.)  So....I made 3 others (the yellow, orange, and dark purple ones) using the same pattern--Grandma Tree by the Royal Sisters.  I attached them all together using a glitter eyelash yarn from Martha Stewart. Then I hung glittery snowflake ornaments that I found at Target (2 for $1! can't beat that!).  I'm in love with my sweet garland bunting!!


Decorating for the holidays just makes me so happy :).

Monday, November 26, 2012

Crochet Couch Caddy

Last year I had gotten a request to create a crocheted couch caddy to hold remotes and other TV items.  I did a quick look online and  didn't find any existing patterns, so I decided to make up one on my own.  It really is a simple pattern and quite easy to customize.  I hope you enjoy making couch caddies!  And as always, let me know if you need something clarified!


**To make a wider caddy, just add chains.  This stitch pattern is worked in multiples of 1.**


Couch Caddy

Dimensions: 10-12 inches wide by a few feet.  Height depends on size of couch arm.
Gauge not important for this project as it is quite customizable.

Materials
-About 550 yards of Aran or Worsted weight yarn.  You’ll be using two strands held together.
-M/N (9.0 mm) or size to give a fabric you like.
-Stitch markers or something to secure the pocket portion in place while you edge the caddy.
-Needle to sew in ends.

**American crochet terms are used in this pattern**
Skills needed:
-Chain
-Double crochet
-Reverse single crochet (aka crab stitch)

Abbreviations:
-CH - chain
-DC – double crochet
-TC – turning chain
-RSC – reverse single crochet

Instructions:

How to determine your caddy’s length:
This pattern allows for about a 1 foot deep pocket.  Measure over the arm of your couch or chair where you wish to use the caddy.  Determine the length that you’d like to dangle off the arm and measure down under the couch cushion.  The end of the caddy will be tucked under the cushion so that it does not slip off.  Add 1 ft to this measurement for the pocket.

Holding two strands of yarn together throughout the pattern…

Row 1: CH 22 (or desired width of caddy).
Row 2: DC in 3rd chain from hook.  DC across.  CH2, turn (20 DC).
Row 3: DC in space between the two DCs in the row below.  You’ll be just about next to the TC.  (See picture).

As you start the row, it will look like this:


You want to go between these first two stitches.


DC in each space across until you reach the space between the previous row’s DC before the TC.  DO NOT DC in this space.  DC in the top of the turning chain. CH2, turn. (20 DC and 1 TC).

Here is a diagram of what you're doing.  Start at the bottom left hand and work back and forth as you go up.  See how the first DC is made between the first two DC and the last is made in the TC, not next to it.


Row 4: Repeat row 3 until the caddy is the desired length, explained above.

Assembly:
-Fold the top of the caddy (where the working yarn is) down about a foot and align the edges.
-Secure on each side using stitch markers or safety pins or binder clips…or the like.
-Begin to RSC all around the caddy.  When you get to the double thickness of the pocket and back of the caddy, be sure to crochet through both layers.
-Once you RSC all around, slip stitch to the beginning RSC.
-Cut yarn and tuck in ends.

If you’d like, you can also sew a line between the pocket and the back to create a divider in the caddy.

Thursday, November 22, 2012

Happy Thanksgiving!

Happy Thanksgiving to everyone celebrating today! I have so very much to be thankful for this year, as always.  My wonderful Mom, my family, my friends, my amazing boyfriend Sean, my health, my success thus far in school, my angels in Heaven, and so much more.  Even if you don't celebrate Thanksgiving today, take a moment or two to remember all that you are thankful for!

And if you feel like baking...why not make some turkey cupcakes?


I spent some time yesterday searching online for easy and cute Turkey cupcakes.  I got a few ideas and headed to the store.  I first thought maybe I'd use candy corn for feathers (like I saw online), but I couldn't find candy corn...then I thought maybe use Nutter Butter cookies for the face...but I couldn't find those either! So, I came up with my own idea.

Here's what you need:
-Your favorite cupcakes (made from scratch or from a box or even store bought!)
-Icing (if your cupcakes aren't iced)
-Vanilla wafers (I used the WhoNu vanilla wafers)
-Pretzel sticks
-M&Ms of some sort (I used pretzel ones)
-Two colors of gel to write on the vanilla wafers (I used red for the beak and purple for the eyes)

What you need to do is:
1) Make two eyes and a beak on the vanilla wafer.  Put these aside to dry (or in the fridge) so that the features harden a little and don't run....(yeah...I wound up with a "crying" turkey at first ha!)

2) Prepare your pretzels.  For each cupcake you'll need 5 sticks.  Break 2 in half.  Starting in the back middle of a cupcake, place in 1 whole pretzel.  Then put two whole pretzels on either side of that one, but push them in a little further so that they are shorter.  Then place a half pretzel on each side of the growing pretzel-feathers.  And finally place the last half on the side, pushing it in a little more.  You want the "feathers" in the middle to be tallest and the ones on the side to be shortest.

3) I separated out the fall colored M&Ms (red, orange, yellow, brown).

4) Place a vanilla wafer at the front of the cupcake--sort of in the cupcake a bit and sort of resting on the icing a little.

5) Place the M&Ms you sorted between the face and the tail to ad some color to the body.

And you're done! :)

Enjoy!!

Wednesday, November 21, 2012

Tada! Pumpkin Pi!

Halloween didn't go as expected in NJ this year, due to Hurricane Sandy.  At work we were all going to dress up in Halloween costumes, which really sounded like such fun!  Remember I had that great idea to be a Pumpkin Pi?  I made little pumpkins and sewed them onto a black shirt in the shape of Pi!  I was THRILLED!  I even made one for Matt. 


Unfortunately I still haven't really gotten a chance to wear it.  I put it on for a very short amount of time on Halloween, but didn't wear it all day.  I really only put it on to take a picture or two and feel a bit "Halloween-y."


I had even made myself "whipped cream" to wear on my head :).


So...what I've decided to do is wear it for Thanksgiving!! I mean...you eat pumpkin pie on Thanksgiving, so why not wear some Pumpkin Pi?!! :)

Saturday, November 17, 2012

Hoot!

I absolutely love making baby hats lately--especially ones for my friends' 4 month old son.  So far I've made him a football hat and a theta hat.  I learned the other day how much his mom loves owls.  So of course I immediately thought I should make him one of the cute owl hats I've seen everywhere.

I decided to make Sarah Zimmerman's crochet owl hat because it looked so cute and had excellent directions! (Oh and as a side note, I adore her blog, Repeat Crafter Me.)  I really cannot wait to make more of these hats!!  I decided to make the 3-6 month size and was very careful about my gauge (I'm usually a tight crocheter).  For the eyes I used vintage buttons that my Baba (grandma) had.  I love the way the hat came out.  It seriously is one of the cutest things I've made!


Thursday, November 15, 2012

Long distance hug

It has been a little over 2 weeks since Hurricane Sandy hit New Jersey and the surrounding area.  The after effects are still quite apparent.  I was very fortunate during the storm.  I lost power in my apartment  for 3 and a half days, but thankfully I was able to go stay with my mom who didn't lose power at all.  A lot of my area was without power for over 10 days.  Transit is still a mess, which makes getting to work and school a bit tricky.  However all of these things seem so insignificant when I think about the people who are homeless now because their houses got destroyed in the storm.  There have been drives for supplies, toiletries, food, clothing, blankets, and other items all over my area.  One was even started at my yoga studio.  My heart just breaks for anyone hurting because of the storm.  Right after Sandy hit, the weather became so so very cold here and people were freezing.  I wish that I could just help everyone one out and make it all better, but I know that I can't do all of that.  So, I tried to do what I could.  I donated 3 bags of gently worn clothes and a whole bunch of brand new socks and underwear in all different sizes.

I still wanted to do more.  I looked around my yarn stash and I realized that I had a bunch of yarn that I could use to make a blanket.  I knew that it would be a challenge to do, but I was determined to make a blanket for donation, as quick as I could.  I gathered up all different kinds of purple-ish yarns that I had.


I had a lot of Lion Brand Homespun, some other Lion Brand color waves yarn (or something like that) and a few other random fuzzy yarns.  I also had a bunch of Red Heart Super Saver in various purples and some white yarn.   I got out one of my largest hooks, held a fuzzy strand and a RHSS strand together, and got crocheting.  I don't remember how many I chained, but the blanket ended up being large enough to cover the top of my full-sized bed.   The blanket is just all double crochets.  I changed yarns as the other ran out and I edged it with a round of single crochets.  I was able to get the entire blanket done within 25 hours of starting it---and no, I did not crochet every single minute of that time :).

I really am happy with the way that it came out.  I love the color changes and it is SO snuggly soft!  I was so happy to donate it at my yoga studio.  I attached a little note to it saying that I was thinking about the person who got it and I hope it kept him/her warm.  I only wish I could make more of these.